Getting Started
Download and Start Fire.app
After buying Fire.app, we will send you an email with download links to your registered PayPal email address. You will also get 1.x updates for free.
Please download the file which is appropriate to your OS and unzip it. Next, proceed to the section below for your OS.
Windows
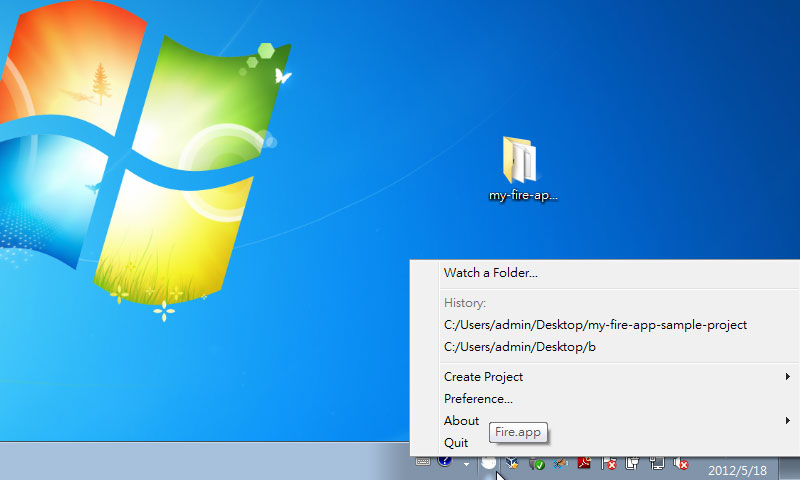
You will get a folder containing all the Fire.app files. You can put this folder anywhere you want. Run Fire-app.exe and you'll see a little gray icon appear in the Windows notification area.
Mac OS
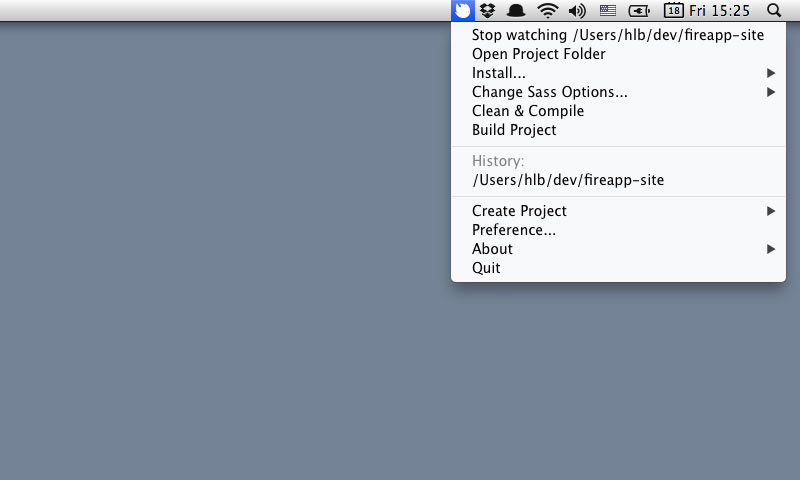
You will get a file named Fire.app. You can put it anywhere you want. Start the app and you'll see a little gray icon appear in the menubar.
Linux
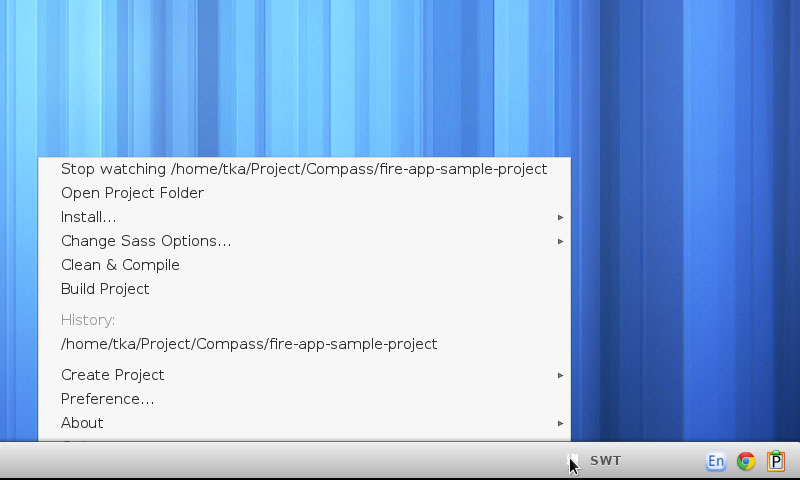
You will get a folder containing all the Fire.app files. You can put this folder anywhere you want. Execute run.sh and you'll see a little gray icon appear in the menubar.
NOTE: Fire.app is written in Java, so it will take a few seconds to start.
Creating Projects
To create a project, click the Fire.app icon and choose "Create Project" then choose the project type you want from any of the frameworks on the list.
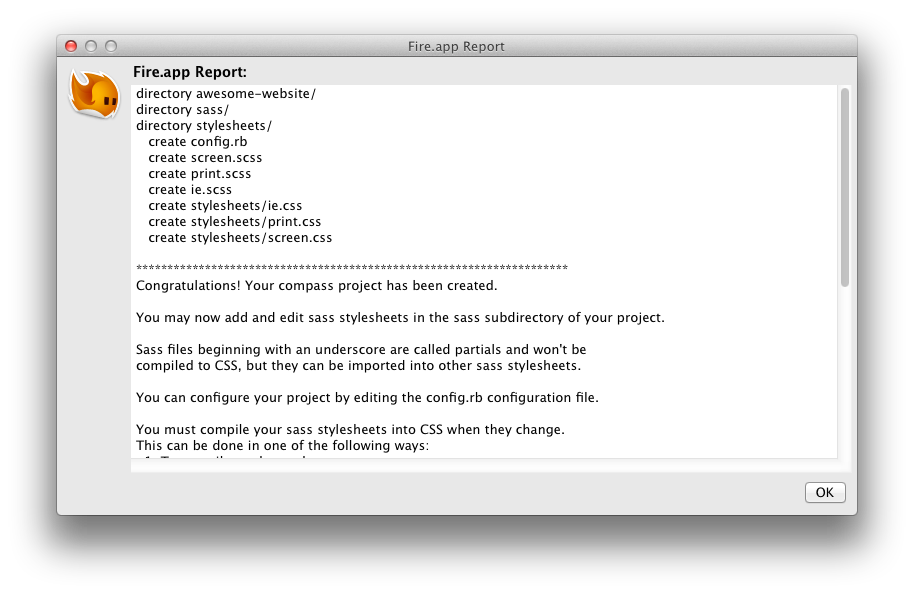
If you don't prefer any of the frameworks, we suggest to choose "compass" -> "project". It will create a compass project which contains sass files and import compass reset by default.
Note: "Fireapp Example" on the "Create Project" list is not a framework but a Fire.app project example. You can read some source code inside this project to learn how to use Fire.app.
Give your new project a name and save it. A dialog window will appear saying your project has been created.
Also, the icon turns orange, which means Fire.app is "watching" your project. If your project is being watched, after you change a Sass/CoffeeScript file it automatically compiles into a corresponding CSS/JavaScript file. Also, you can use Fire.app's built-in web server to see the project result in your browser.
Let's build a compass project as an example. The project folder should look like this:
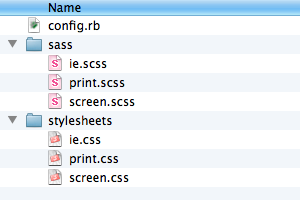
awesome-website/
  sass/          // Sass folder.
    screen.scss
    ...
  stylesheets/   // Default CSS output folder.
    ...
  .sass-cache/   // The hidden sass cache folder. Do not touch it.
  config.rb      // Compass setting. Do not remove it.
Editing and Preview
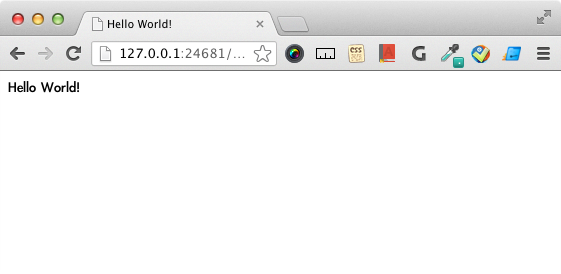
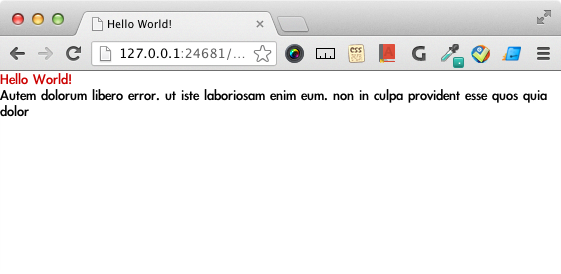
Add a file to the project folder and name it index.html. Then write some content like Hello World!. Save the file and open http://127.0.0.1:24681/index.html in your browser. You will see the result of your code.
Next, add more HTML to import a CSS file which is generated from a Sass file. For example, here is what it looks like:
<!DOCTYPE html>
<html>
<head>
  <meta charset="UTF-8">
  <title>Hello World!</title>
  <link href="/stylesheets/screen.css" media="screen" rel="stylesheet" />
</head>
<body>
  <h1>Hello World!</h1>
</body>
</html>
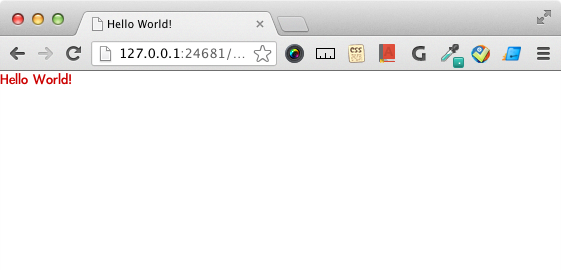
Write some CSS in the corresponding Sass file /sass/screen.scss for a test. For example:
h1 {
    color: #cc0000;
}
Because SCSS is a superset of CSS syntax, we can just write normal CSS here. Switch to the browser and refresh the page, then you'll see the result.
Using Template Languages
Using template languages with Fire.app is very easy, simply name the file with a corresponding file extension. For example, rename your index.html to index.html.erb then you can use the ERB template language.
After renaming the file, you can add a lorem ipsum helper <%= lorem_paragraph %> after h1 to generate a paragraph. Here's what it looks like:
<!DOCTYPE html>
<html>
<head>
  <meta charset="UTF-8">
  <title>Hello World!</title>
  <link href="/stylesheets/screen.css" media="screen" rel="stylesheet" type="text/css" />
</head>
<body>
  <h1>Hello World!</h1>
  <%= lorem_paragraph %>
</body>
</html>
Save the file and refresh the browser. Now you will see the lorem peragraph.
If you want to learn more about template languages or Fire.app's built-in helpers, please follow these links below.
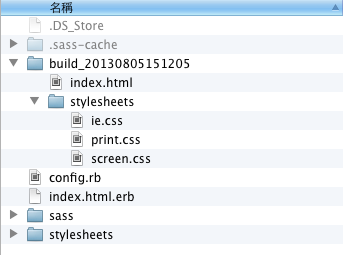
Generating Static Files
After completing your project, you can use "Build Project" to generate the static files. Click the Fire.app icon and choose "Build Project". You will get a folder named build_############## which contains all the static files generated from your project.